Using eSIM on iPhone provides convenience and flexibility for users in managing mobile network connections. However, many people still feel confused when setting up and activating eSIM on their devices. In this article, we'll explore how to set up eSIM on iPhone in a simple and effective way.
How to Set Up eSIM on iPhone:
1. Check Device Compatibility
First, ensure that your iPhone supports eSIM. This can be checked in the settings of your device.
2. Prepare eSIM
Before setting up eSIM, you need to have a QR code or activation code from your network provider. Contact your provider to receive specific instructions and activation codes to proceed with the eSIM setup.
3. Scan eSIM Activation Code
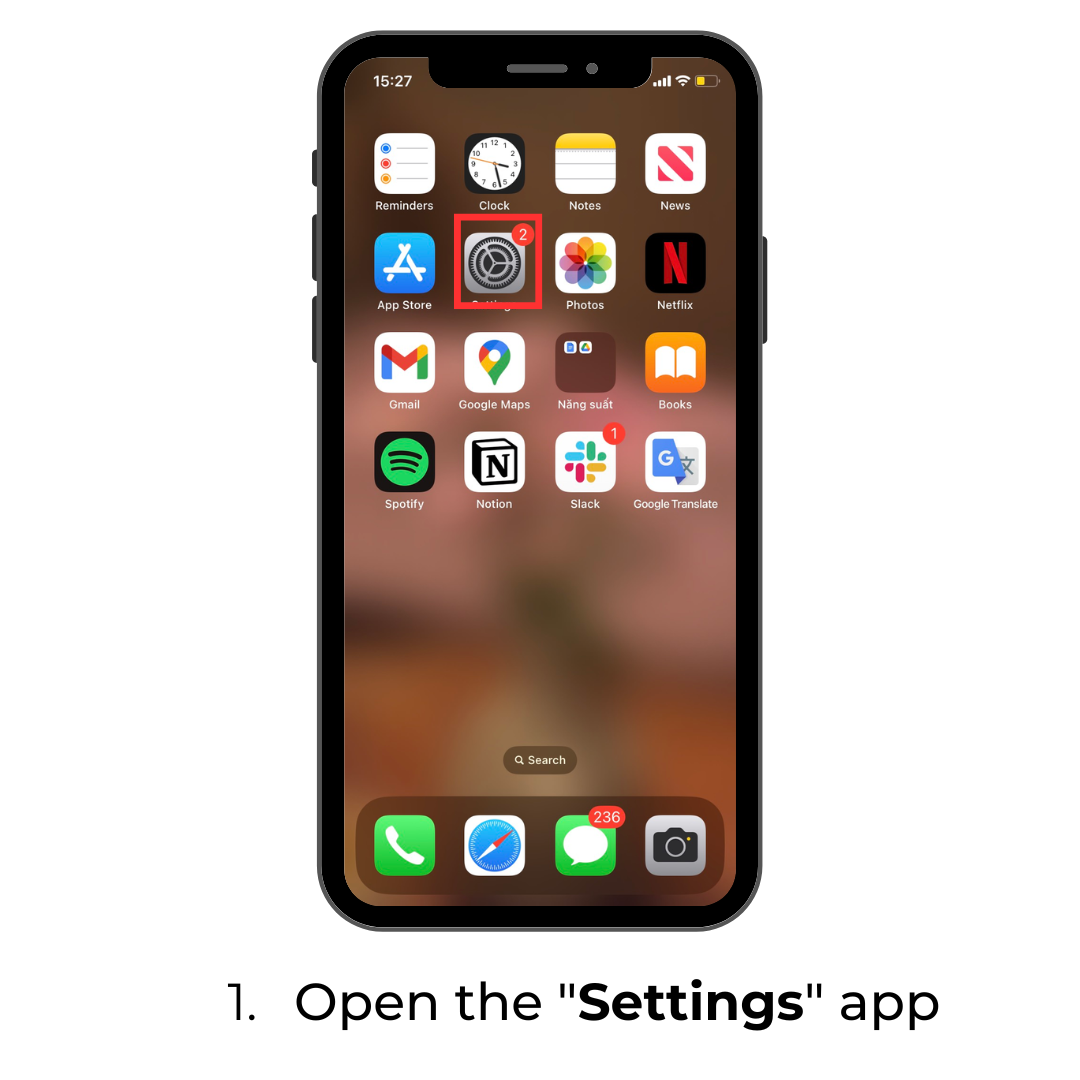
After receiving the activation code from your network provider, open the "Settings" app on your iPhone.
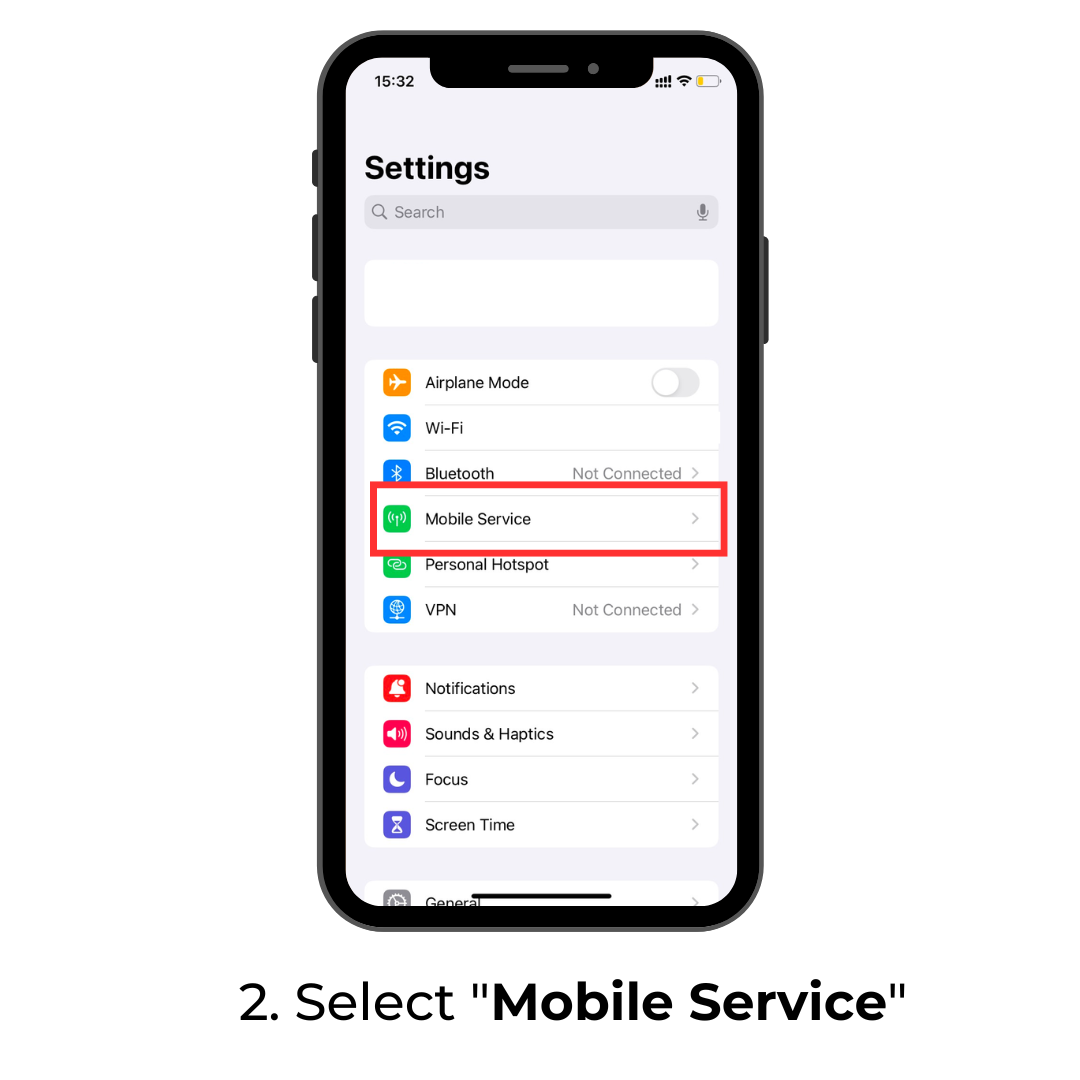
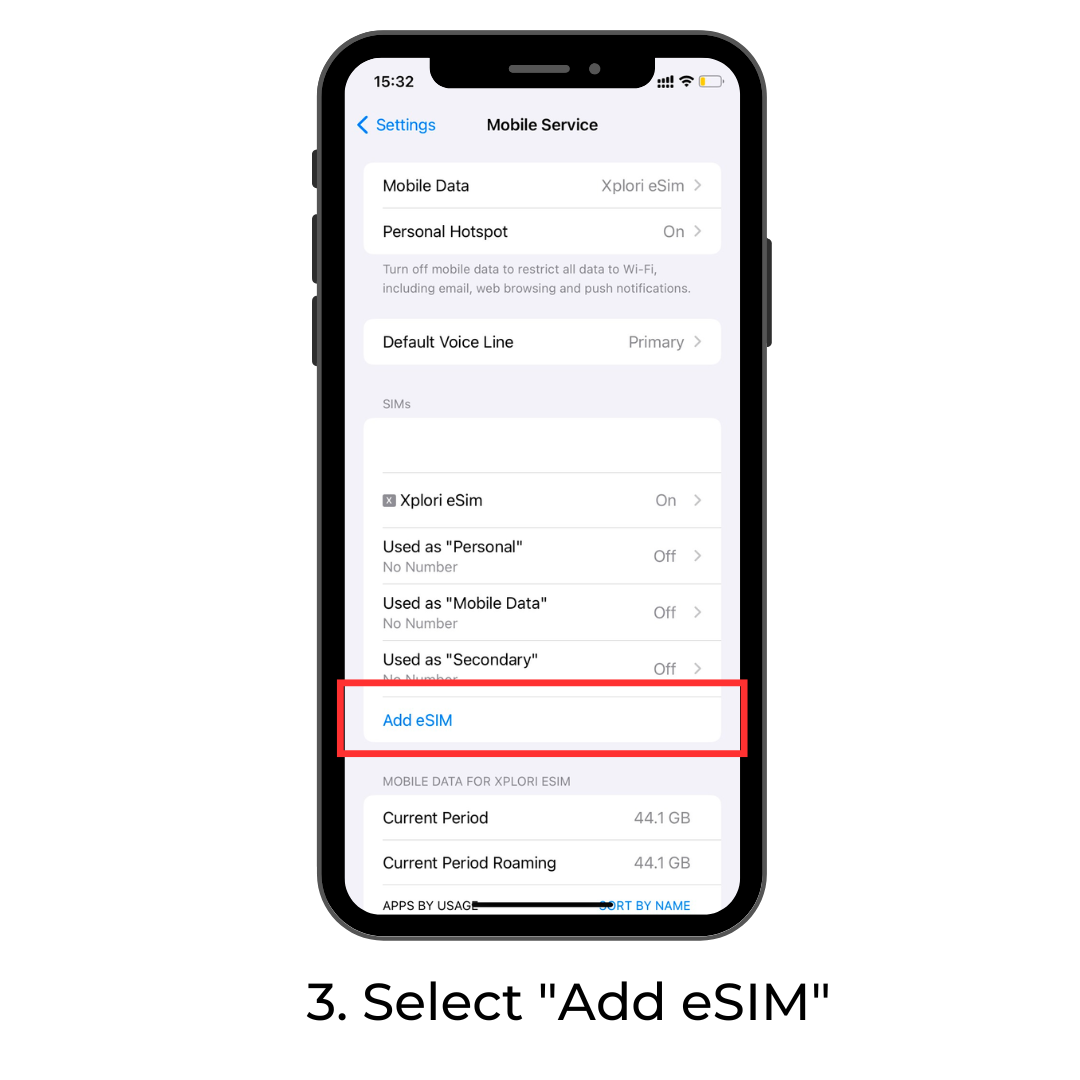
In the "Settings" section, select "Cellular" and then choose "Add Cellular Plan."
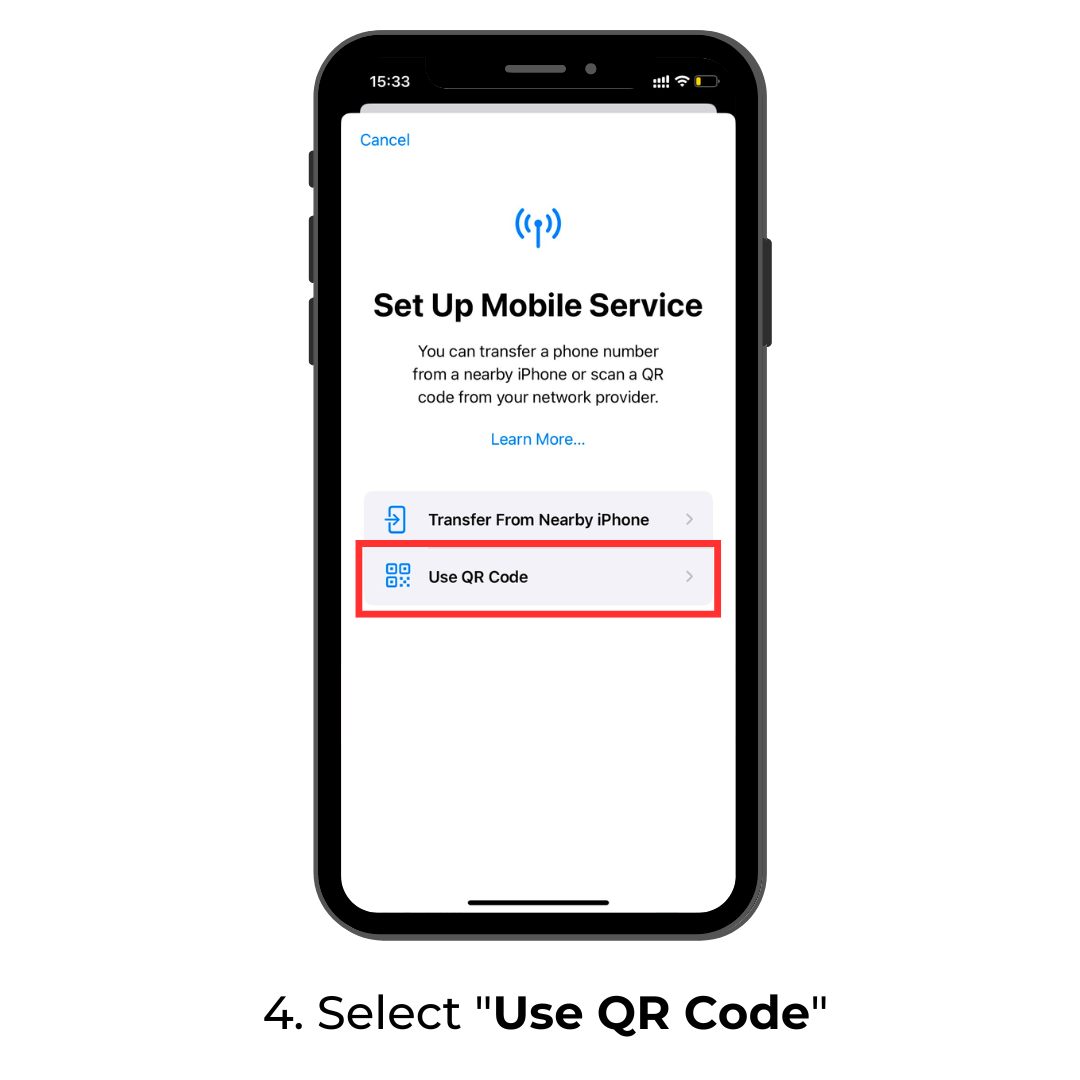
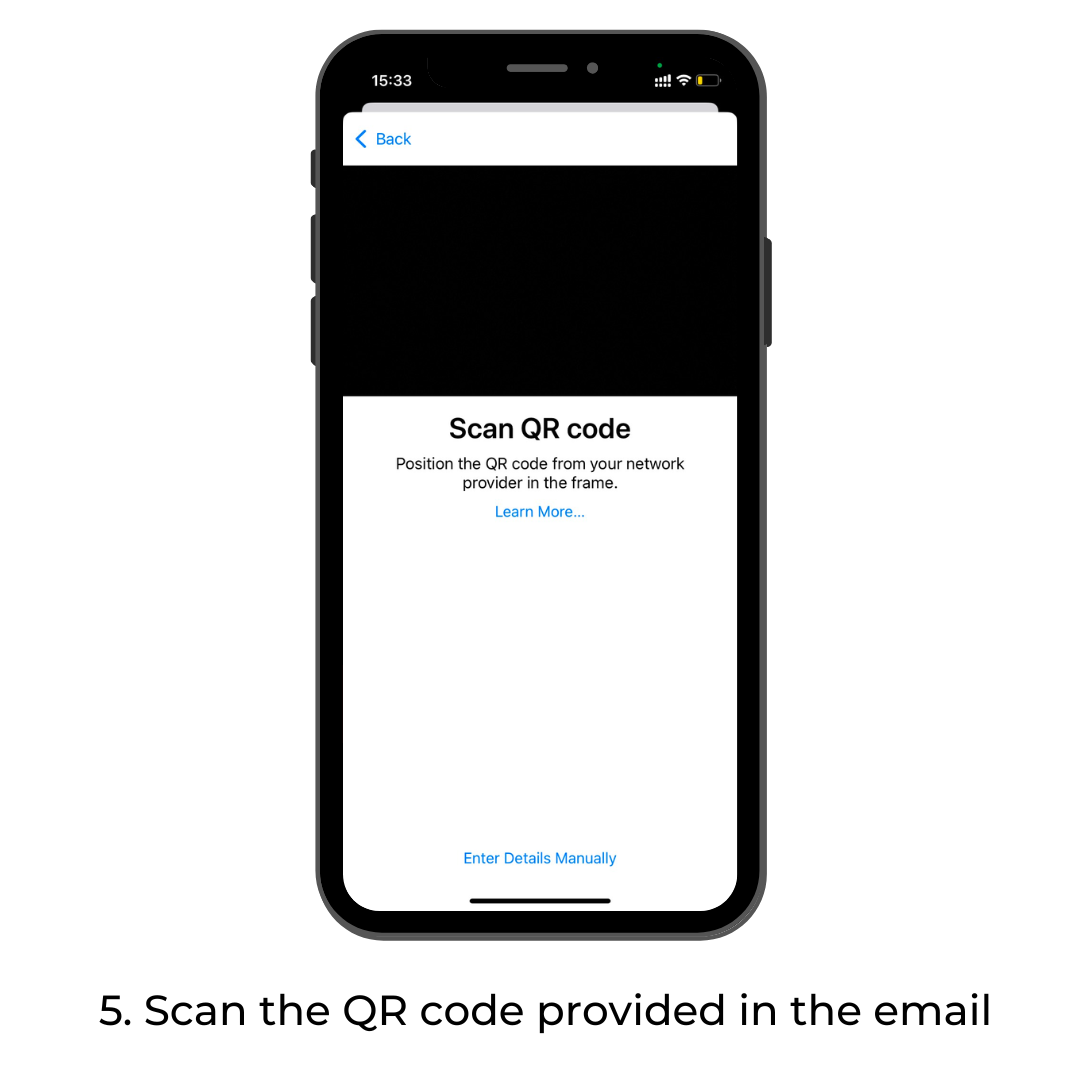
Next, you'll be prompted to scan the eSIM activation code you received from the provider. Follow the on-screen instructions to complete this process.
4. Completion and Activation of eSIM
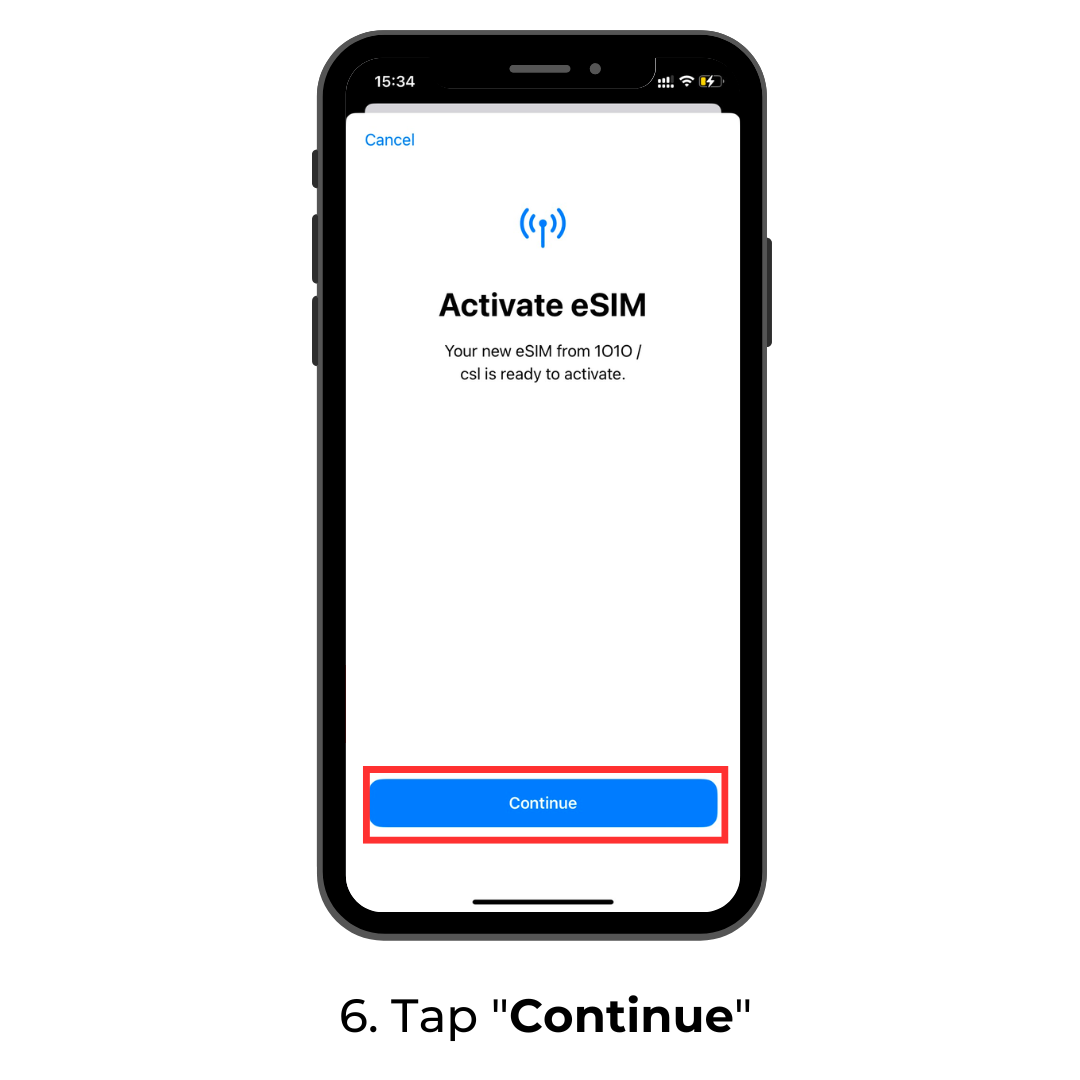
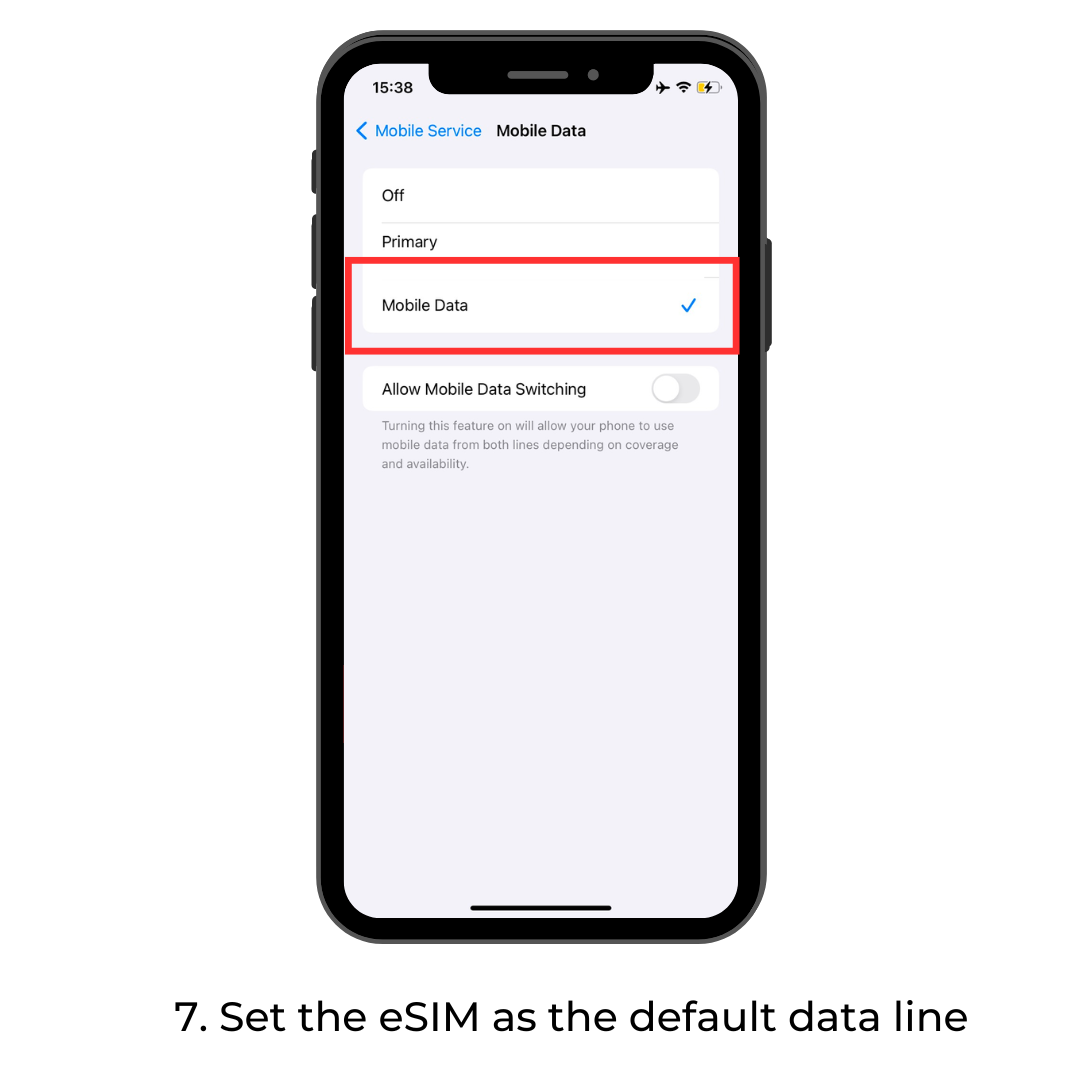
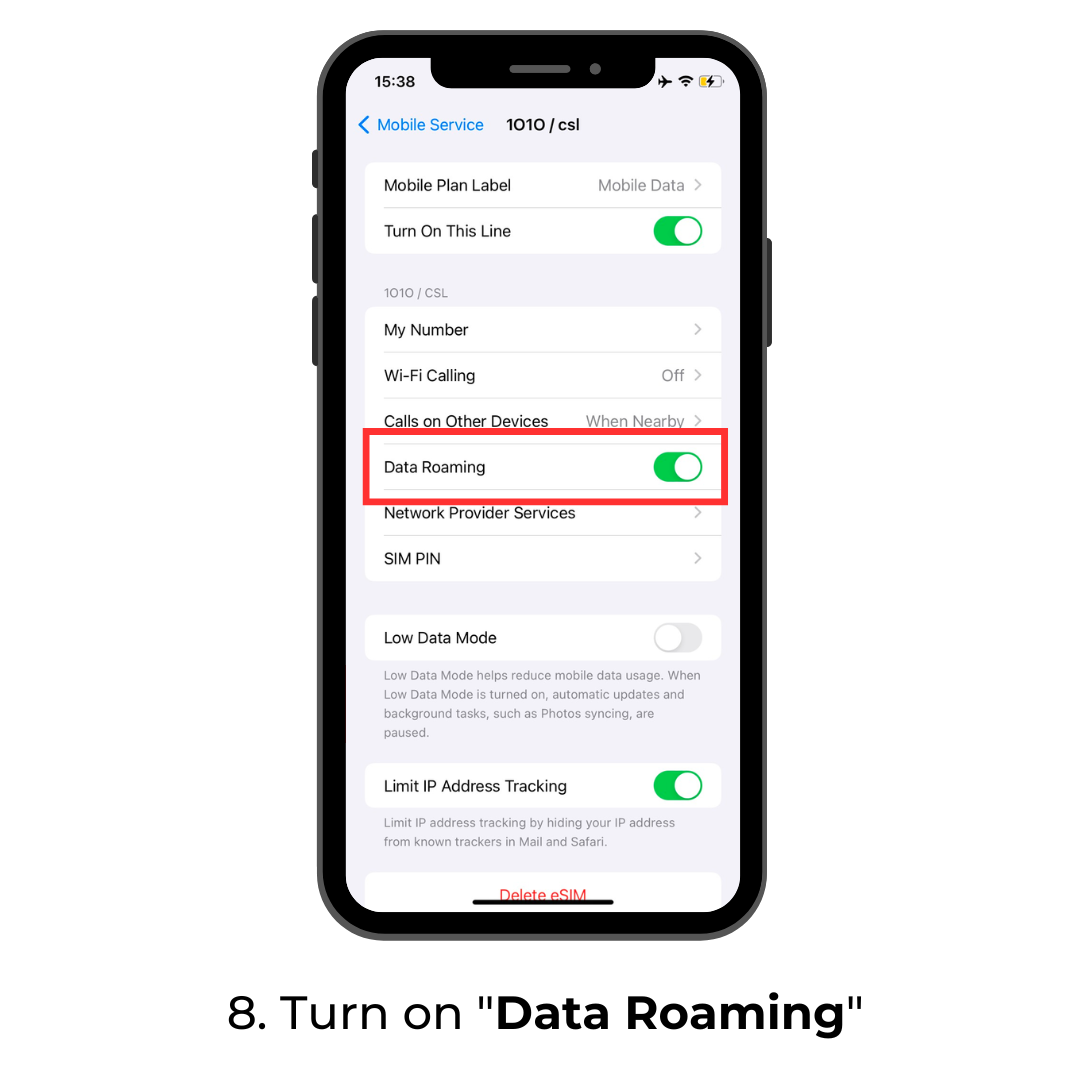
After successfully scanning the activation code, follow the on-screen instructions to complete the setup and activation of eSIM on your iPhone.
Conclusion:
Setting up and activating eSIM on iPhone is not as difficult as you might think. By following the simple steps outlined in this article, you can easily and successfully accomplish this task. Enjoy the convenience and flexibility that eSIM brings to your phone usage experience!
If you need to use eSIM to connect while traveling, you can refer to the list of suitable eSIMs for the international countries you plan to visit on the WoWeSim website!
Powered by Froala Editor
